Breaking Bread and Blending Cultures with Flower Preserves
When researching ancient customs and traditions, I have to admit I sometimes feel a bit uprooted. My European ancestors carried traditions down through generations, many centered around the plants and landscape of their homeland. But North America is different. I carry no genetic ties to the original people of this land but it has always been my home - I grew up amongst the sagebrush of the high deserts of Idaho, found my calling in the windy grasslands of Alberta, and explored my purpose in the moss-covered rainforests of Oregon. The Pacific Northwest magic lies in its diversity; a jumble of immigrated cultures finding a new home in the homeland of completely different ones. My approach to food, herbalism, and magic is a patchwork quilt comprised of ancestral customs, Native research, lots of experimentation, and a good amount of time spent in nature, listening to the plants that surround me here and now.
Rebecca Solnit sums up my feelings about living in this region perfectly in her book A Field Guide To Getting Lost:
“The vast spaces of the American West, so little known to its immigrants even now, have always invited travelers to lose their past like so much luggage and reinvent themselves.”
It’s impossible for any culture to carry all of their old traditions to a new landscape without any alteration or change; humans are impacted by our surroundings, other people, different needs (the sweat-inducing spicy foods of India are not nearly so effective during a chilly Oregon coast summer, for example.) Food and medicine are particularly versatile and thus the borders are particularly blurry. We learn about other cultures by sharing food with each other. We heal people who belong to different races or places with the herbs we know are sacred because our shared humanity compels us to help when we can. (At least, one would hope.) Our cuisines shift and take on new flavors and techniques as a result of these blurred borders and gifted recipes. We blend.
I picture my metaphorical pantry as being filled with potion bottles full of different colored liquids, some with sparkles and some glowing eerily. The labels might say “Italian,” or “French,” or “Mexican,” but many also have longer titles; “Something my grandmother taught me but I don’t know where it’s from,” “an idea I overheard on the city bus in college,” “a gift I was given by someone I admire,” and so on. There are a couple of big bottles, too. They say: “ideas that are so integral to humanity they span across cultures and times” and “the lessons the plants teach all of us.” When I’m coming up with a recipe or writing about an idea, I pull out my cauldron and start mixing. A dash of “archetypal symbolism” with a few drops of “Italian heritage recipes” becomes sunwheel-inspired corsetti pasta. A teacup of “something beautiful that was shared with me once” plus a spoon of “lessons from a plant I love” becomes how to make green walnut liqueur. It’s an alchemical process of defining my particular place and this particular time. I soak up inspiration like a sponge, decanting it further into more precious bottles that I store away to play with during a rainy day.
I love the messy way we all blend together. I love that our cultural boundaries are blurred and winding. I love that we openly share so much of what feeds us with others. I want to continue the tradition of enriching life by borrowing and trading and gifting. And perhaps the most obvious way to do that is through food. There’s one thing we all have in common: food is the center of our community. We all celebrate with parties and feasts; we lose ourselves in fermented drinks; we bring offerings of food to new neighbors and friends; we connect over the sharing of bread or wine. We also instill sacred-ness into what we consume. This can be a religiously symbolic sort of sacredness like the fried foods of Hanukkah or the wine of Communion, or it can be a more personal kind of sacredness like Grandma Halka’s famous Polish lemon chicken. It can be secret family recipes or favorite desserts. (Even jello salad can hold its own sacred magic, just ask my midwestern cousin.) But no matter what kind of sacredness our food holds, it begs to be shared.
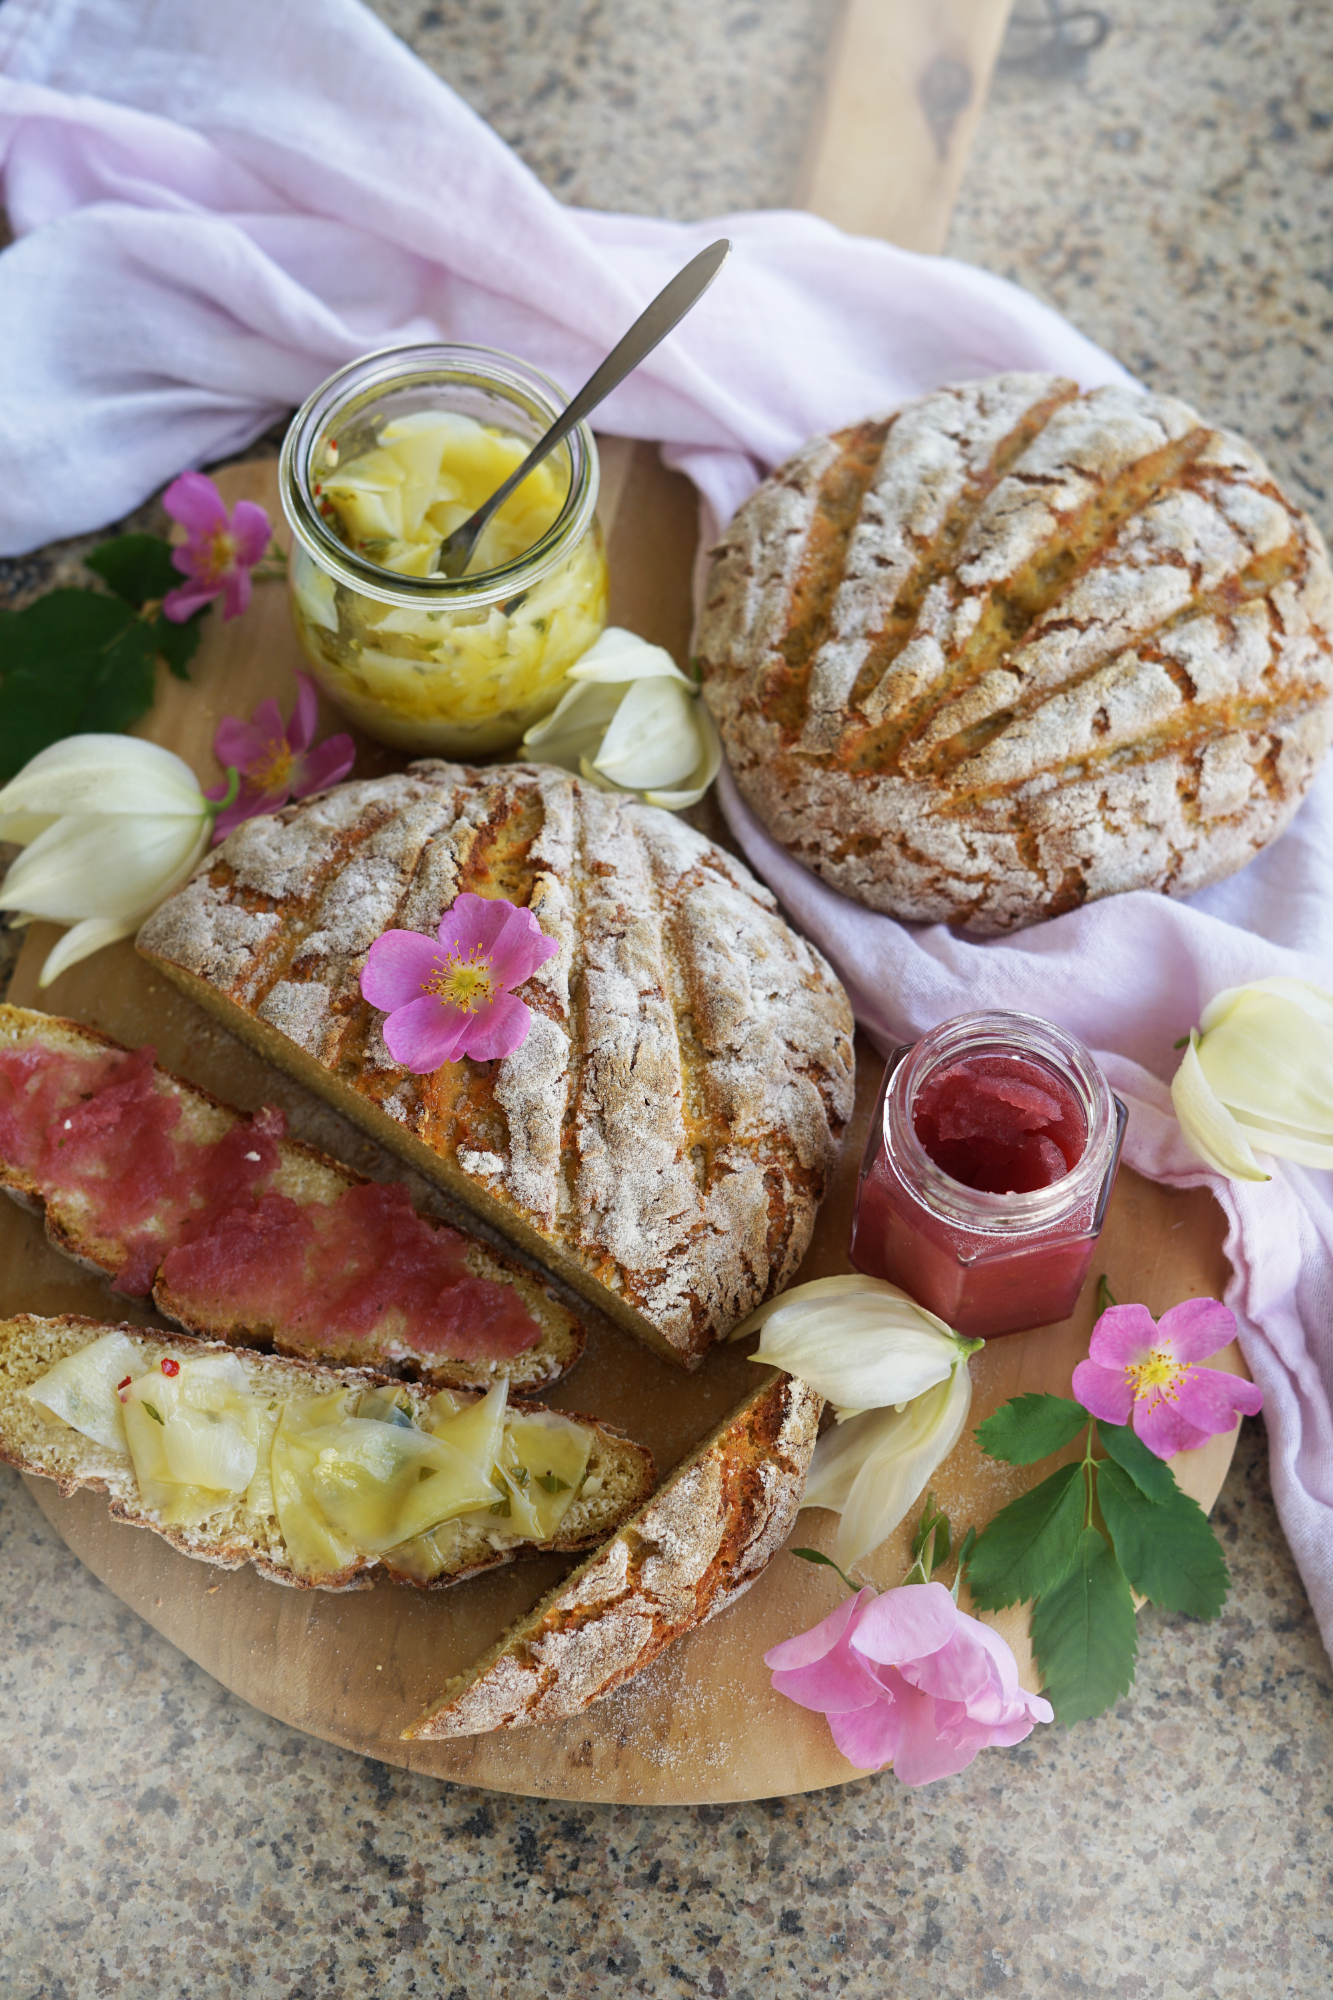
That’s why today I’m sharing a couple of my favorite early summer recipes for preserves that borrow from other cultures and traditions but are filled with the unmistakable flavor of the region that is my home. These recipes are perfect for gifting and sharing, an opportunity for further exploring those culinary bonds that hold us together. And they also pair perfectly with bread, which is such a common gesture of neighborly goodwill it’s become an archetype of hospitality in and of itself. At at time of particular cultural unrest and cruelty in my homeland of the USA, we need to remember that we owe it to our human race to extend that goodwill to those with different backgrounds than us. We have so much to learn from each other, so much to share, and, yes, so much to give. Let us remember all of those hands that have been extended to our ancestors in help and welcome and extend our own. Let us help when we can help in whatever capacity we are able to. And finally, let us break some bread with our neighbors.
Marinated Yucca Petals:
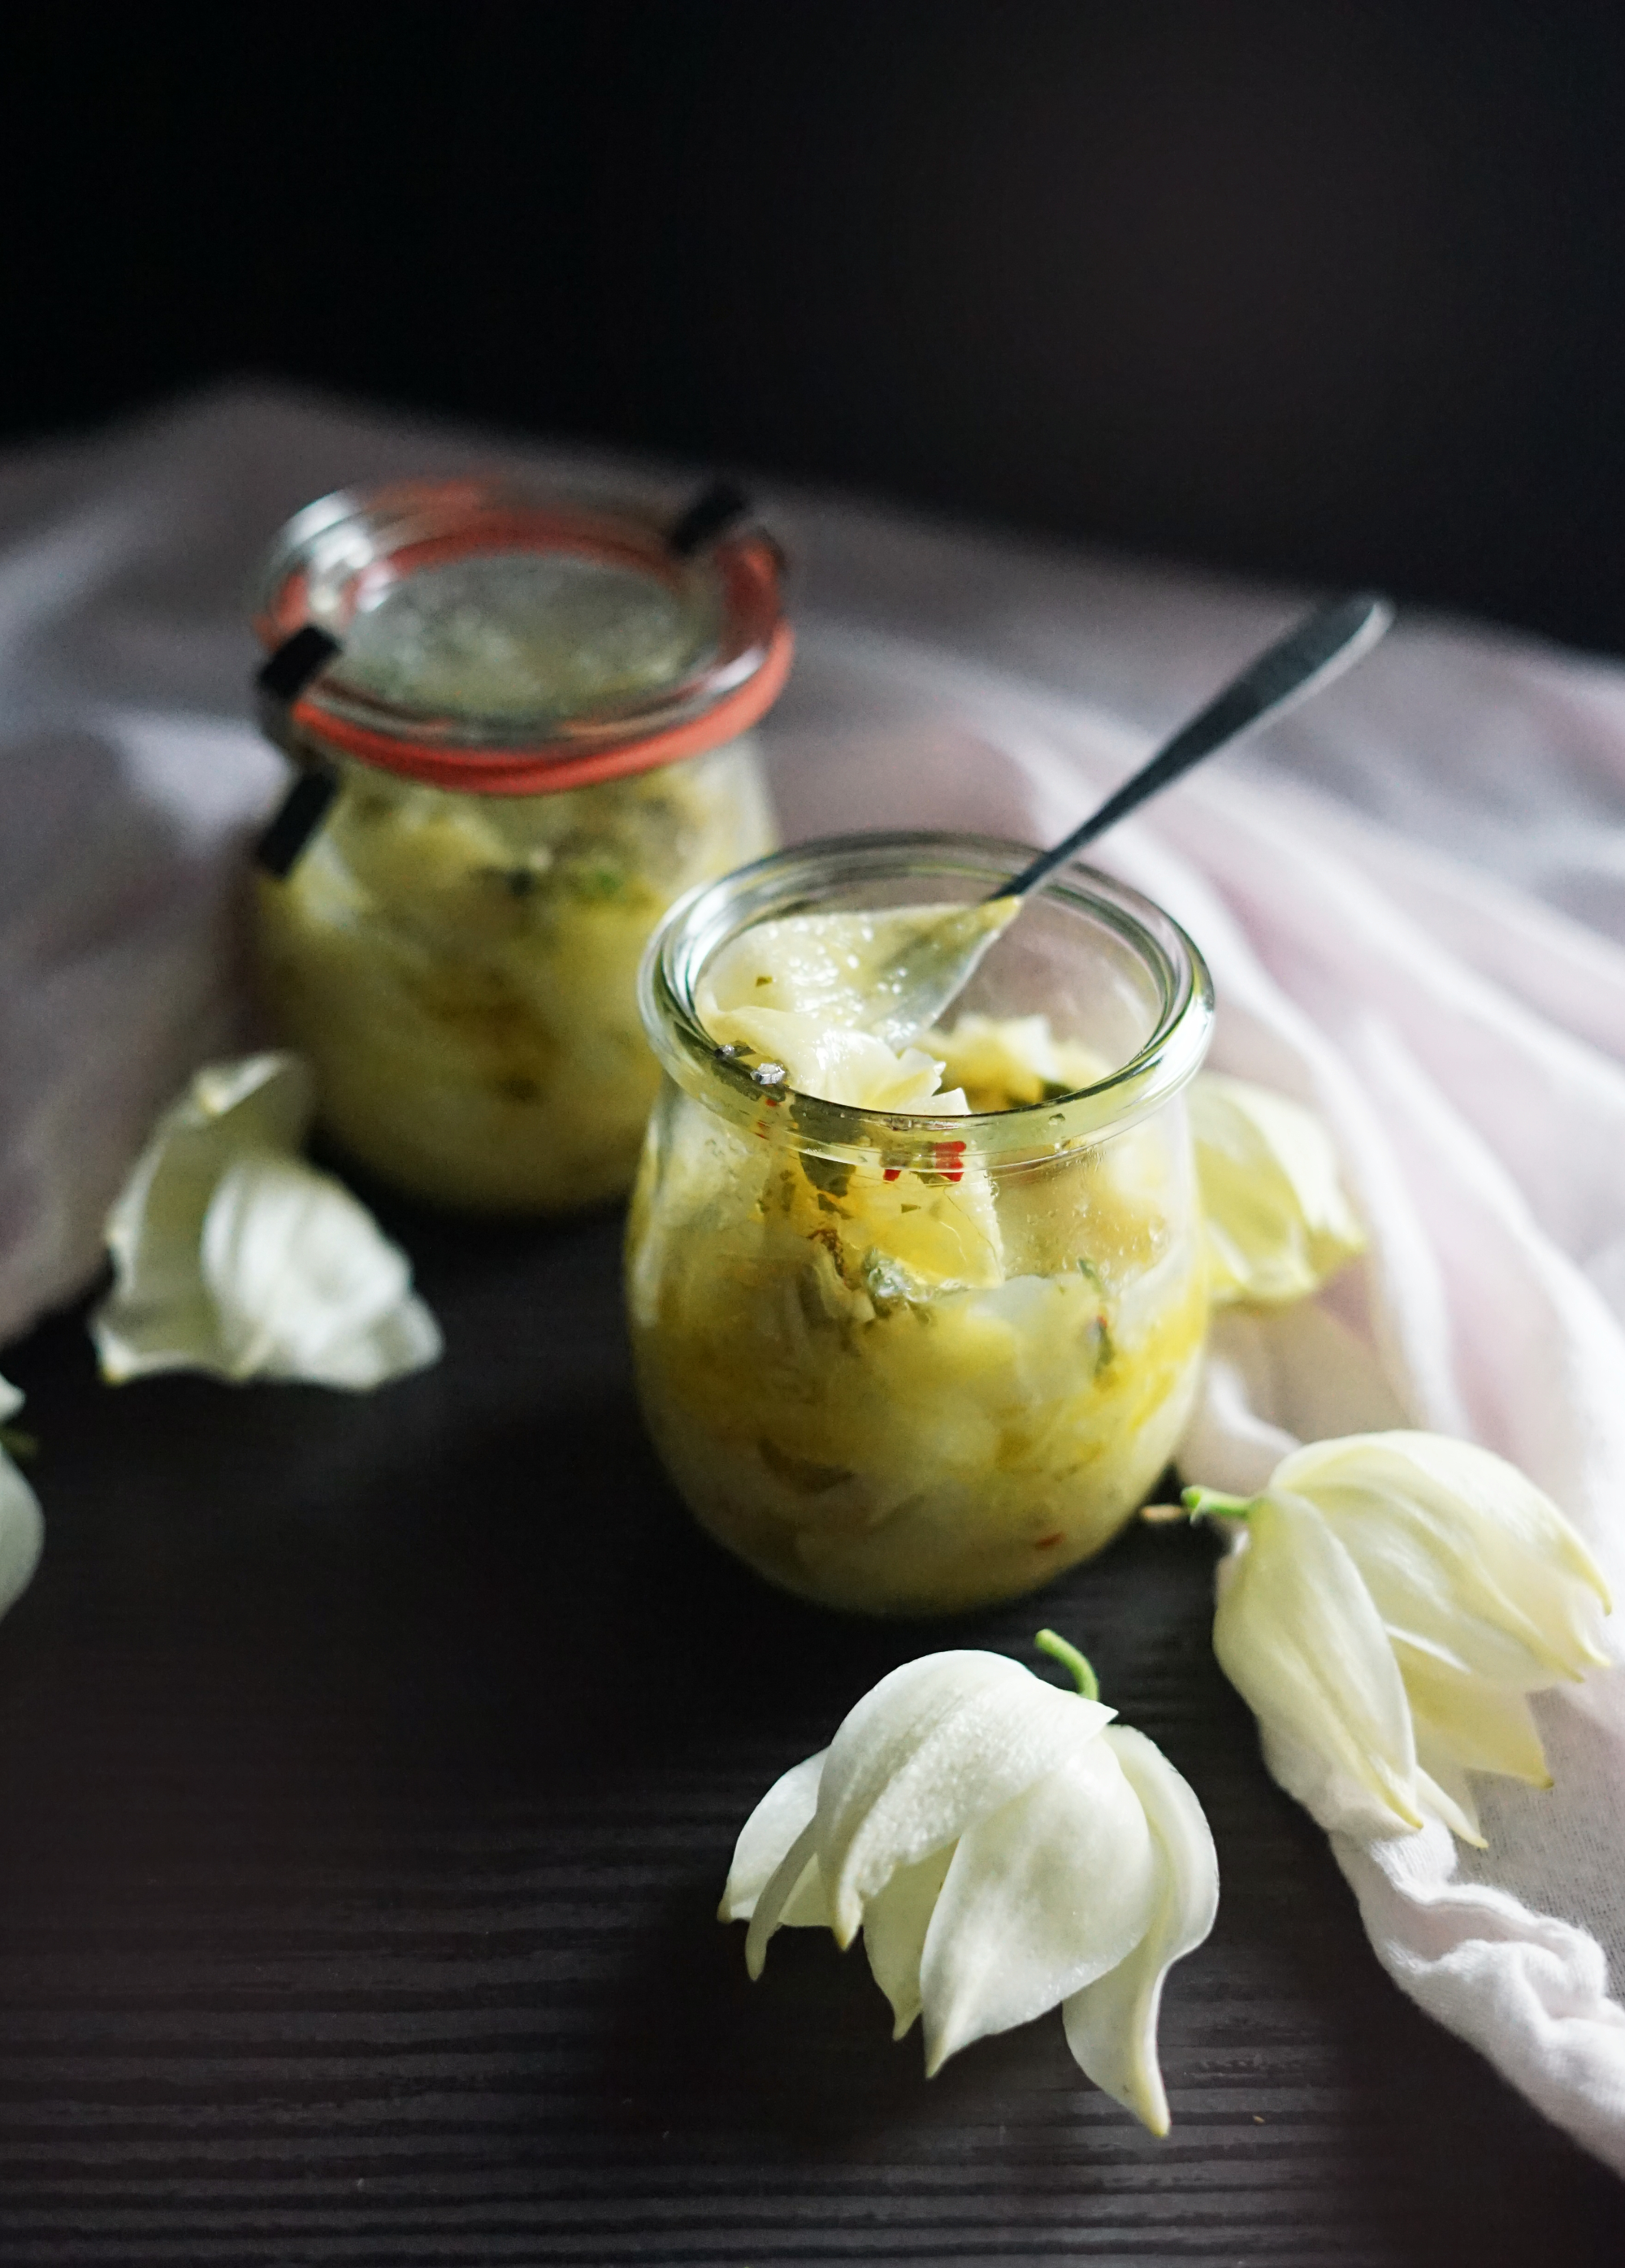
Yucca flowers are a well-loved specialty in the southwestern US and Mexico, where they have long been served stewed in chile sauces or fried with eggs. Those traditions of cooking yucca flowers in savory meals laid the foundation for further exploration: I got the idea for this recipe from one of my favorite wild food bloggers, Hunger and Thirst, who based her idea on making yucca petal antipasti on the fact that yucca petals taste slightly like artichoke. The ingredients in this recipe are clearly Italian-inspired but this recipe’s main ingredient speaks of the sandy deserts of the American West. What a perfect fusion of inspiration, don’t you think?
In my opinion, these are even better than marinated artichokes - the texture is like the very finest and softest artichoke petals with a mild flavor that soaks up the flavorings and spices wonderfully. The first time I whipped up a batch, I couldn’t stop eating them and ate the whole jar in one evening. They’re that good. I like them spread over buttered artisanal bread but they’re also fantastic tossed into pasta or salads or set out as part of an appetizer platter with some good cheese. P.S. Make sure you don't confuse yucca with yuca (cassava), which is a different plant without edible flowers. Gather young flowers that have only just opened as they can become bitter with time. Also note that you can eat yucca petals raw, but some people have a negative reaction to the saponins found in the petals (which can trigger an itchy throat or stomach upset) so I’ve found that cooking them is generally safer.
Ingredients:
2 c. fresh yucca petals (remove the petals and discard the center of the flower)
1 1/2 tsp. salt, divided
2 Tbs. high quality olive oil
1/2 tsp. fresh thyme leaves
1 tsp. fresh basil leaves
1/4 tsp. red chile flakes, crushed
1/4 tsp. garlic, minced
4 Tbs. fresh lemon juice
Directions:
Put 1 tsp. of the salt into a small saucepan and fill about halfway with water. Bring to a boil. Blanch the yucca petals for one minute, then plunge into cold water. Drain and gently pat dry.
Put the dried yucca petals in a sterilized glass jar or airtight container. Leave a little air space in between the petals - don’t pack them in too tight. Mix the remaining ingredients and pour over the yucca petals. Marinate in the fridge overnight, then enjoy!
This mixture will keep for a couple of weeks in the fridge in an airtight container. You can also freeze it and then enjoy later.
Wild Rose Petal Jam:
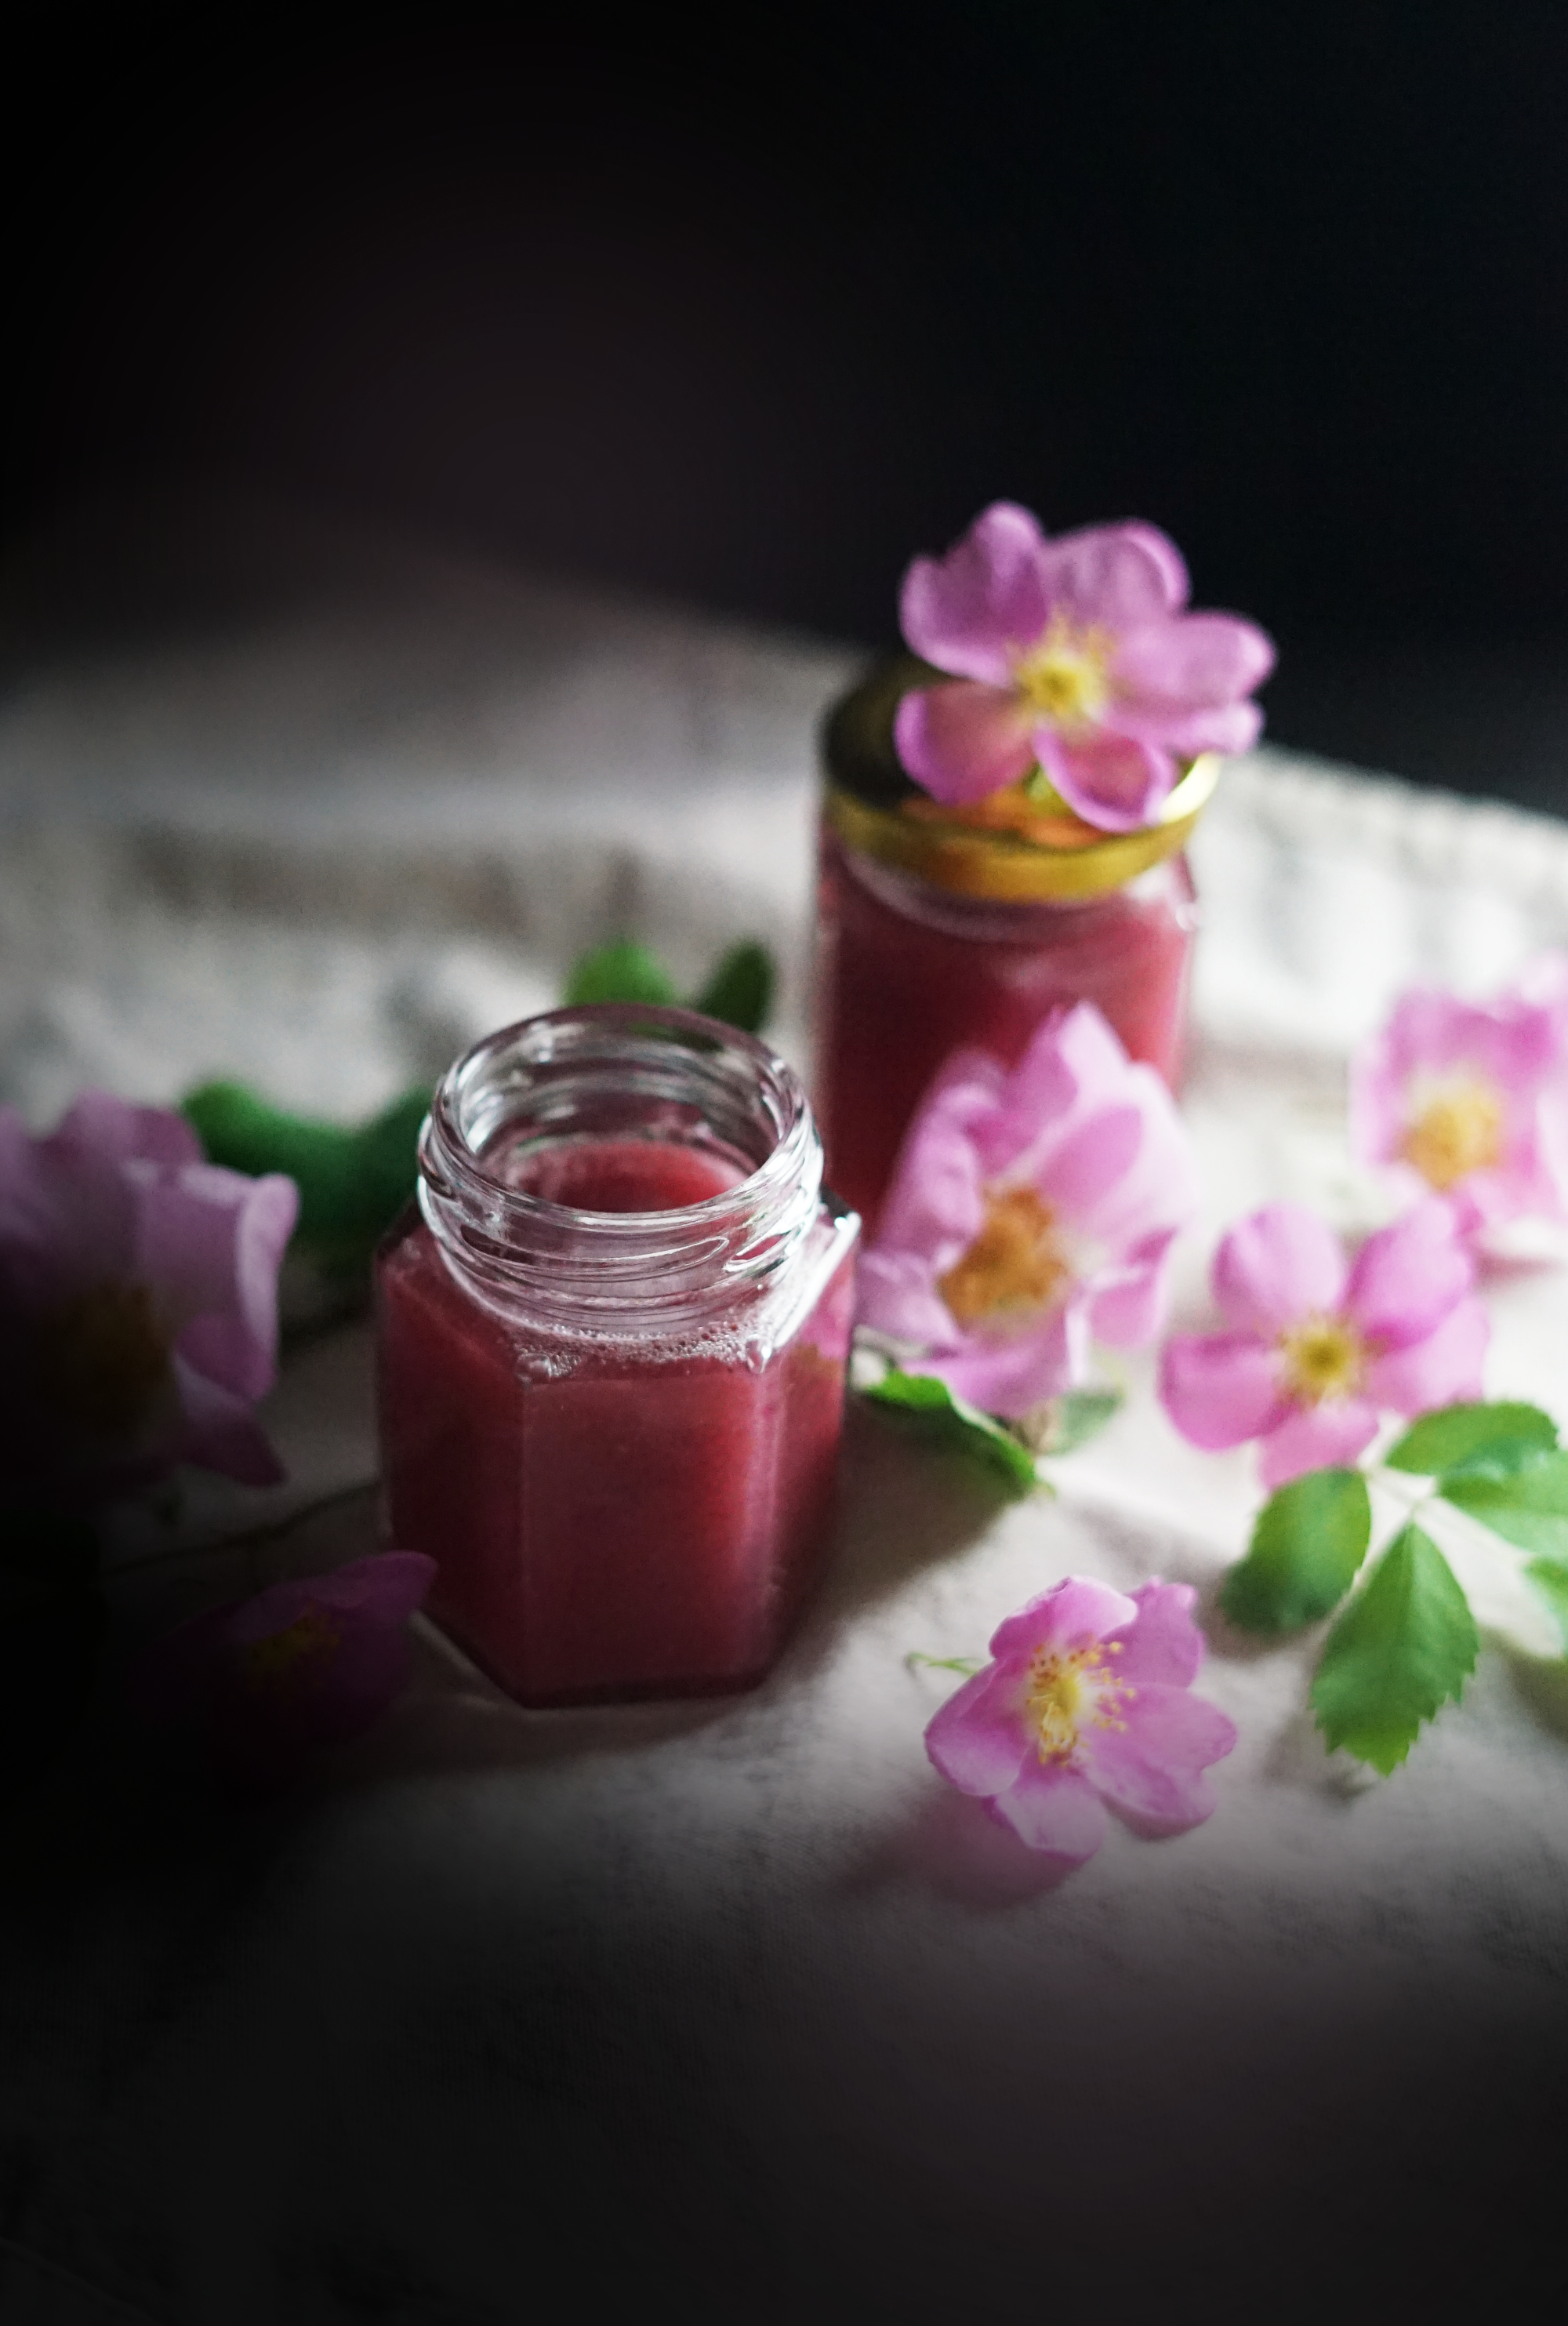
I have my Polish grandmother to thank for this recipe. This technique of soaking the rose petals in sugar overnight to tenderize them has been handed down from generation to generation. My foremothers ate it as a filling for pączki, delicious fried doughnuts eaten on celebratory occasions. Rose petal jam has been eaten throughout Europe for hundreds of years, though it is more of a specialty food anymore. I think it’s even more delicious when made with the native wild roses here in the Pacific Northwest, the Nootka rose. The petals of this rose are smaller than most garden varieties and it only has five petals. I’ve found them to have less bitterness than larger imported varieties, and their scent reminds me of heavenly sun-drenched afternoons in the forests that I love.
These particular roses also carried a sacredness to many indigenous peoples, who used them both ceremonially and as medicine. And good medicine they are indeed - wild roses remind me to indulge in the sensory delights of life and show love for myself and others. They are the perfect treat to share with someone you want to show goodwill towards (or perhaps even romance.) Try this jam spread simply on some good bread or folded into rich yogurt and let that sunshine-filled tartness of early summer carry you off to perfumed bliss.
Ingredients:
4 oz fresh rose petals with the white base trimmed off (about 4 c. gently packed)
2 c. sugar, divided
Juice of 2 lemons
3 c. water
1 (1.75 oz) package powdered pectin
Directions:
Toss the rose petals, lemon juice, and 1 cup sugar until evenly coated. Cover and let sit at room temperature overnight. This helps to soften the petals to make a smoother jam.
The next day, bring the water to boil over medium heat in a medium saucepan. Stir in the reserved 1 c. sugar and dissolve, then add the rose petal mixture and stir until all of the sugar has dissolved. Reduce heat and simmer for 20 minutes, or until the petals are translucent and the mixture has thickened.
Bring back to a boil for 5 minutes and stir in the pectin. Boil another couple of minutes.
Pour the jam into sterilized jars. These will keep in the fridge for several weeks.
To can this jam to enjoy months later, bring a pot of water to a boil while you’re cooking the jam. Immediately after filling, gently screw the lids on the jars (don’t tighten too much) and place them in the boiling water for 15 minutes to seal and sterilize them. Let the jam jars cool, then tighten the lids all the way.
Note: if you’d like to make a smooth jam like the one pictured here, just blend the hot liquid in a blender until smooth before pouring it into jars. You may want to add a little extra pectin (¼ or ½ of a package) for a firmer spread.
Rustic Cattail Pollen Gluten Free Bread:
This recipe is designed to “break bread,” both literally and figuratively. Today that phrase means “to engage in a comfortable, friendly interaction,” and it came from the literal action of breaking pieces of bread off to share and eat with others (a colleague, friend, or even strangers on the road.) It’s come to represent a shared meal and/or a gesture of goodwill. Eat it with those you love or present it as a gift to friends, family, or neighbors. It will be an especially welcome gesture to friends on gluten-free diets, as good homemade wheat-less bread is hard to come by!
Cattail pollen is one of my favorite things to add to baked goods for its lovely bright yellow color and mild, corn-like floral flavor. This bread is both flavorful and neutral, delicious with either antipasti yucca petals or rose petal jam. Just to specify: cattail pollen is not the brown “fluff” that you find on cattails later in the summer. Rather, it grows on the male spires above the small, green, female cattails in early summer and is bright yellow in color. The window for foraging cattail pollen is very short (only about a week!) so keep a close eye on your cattail patch starting in early June! Make sure you are harvesting from a clean location. To gather cattail pollen tops, hold a paper bag underneath them to catch them and snip them off at the base. (And remember, don’t take more than ¼ of all the ones you see!) Leave your paper bag overnight to allow any critters to crawl away and let the pollen loosen itself from the tops, then shake the bag really well with the top held firmly together. Sift the resulting mixture to separate the pollen from any fluff or bugs. You can repeat the process one more time with the pollen tops - I am often surprised at how much I get the second time around.
Loosely based on a recipe in Gluten Free Artisan Bread in Five Minutes A Day
Ingredients:
1 c. white rice flour, plus extra for dusting
¾ c. sorghum flour
½ c. tapioca flour (starch)
½ c. potato starch
½ c. cattail pollen
1 Tbs. xantham gum
¾ Tbs. granulated yeast
3/4 tsp. . sea salt
1 Tbs. sugar
2 large eggs at room temperature, optional. (Gives bread a lighter texture)
Lukewarm water
Directions:
Sift together the flours, pollen, xantham gum, yeast, salt, and sugar. Warm the water to lukewarm (about 100F, just above body temperature.) Don’t get it too hot or it will kill the yeast. Place the eggs into a measuring cup and add the warm water to bring the total volume to 2 - 2 1/4 c. liquid. (If you don’t use eggs, you’ll just use the same volume of lukewarm water.)
Add the water and mix well with a large spoon or in a stand mixture with paddle attachment set to “low.” Mix until very smooth.
Cover with a loose lid or plastic wrap and allow to rise for about two hours at room temperature, or until it’s slightly puffy. (It won’t rise quite as much as regular bread.)
Gently divide the dough into two sections. Place them on some parchment paper or a pizza peel covered in cornmeal. Pat them into a round boule shape (avoid knocking out the air as much as possible.) Dust the tops with extra white rice flour. Gently cover with plastic wrap and allow to rise for another hour and a half.
Place a baking stone in your oven and put a small pan off to the side of it. Preheat the oven to 450F (which takes about half an hour to bring the stone up to temperature.)
Slash a ½” deep scallop pattern into the loaves using a wet serrated bread knife.
Gently slide the loaves onto the baking stone using a pizza peel, or place them on a heavy metal baking tray and put that in the oven. Quickly pour 1 c. of hot water into the extra tray and close the oven door immediately. This will create steam to give your bread a harder crust.
Bake for 20 minutes, then pull the parchment paper out from under the loaves (if you used it.) Bake for another 25 minutes, or until the crust is browned and firm to the touch. (The interior of the loaf should read 205F on an instant-read thermometer.) Allow to cool completely (this is especially important for gluten free breads!) Eat within the same day of baking, as gluten-free breads harden quickly.
Some last thoughts, courtesy of Rebecca Solnit once again:
“The landscape in which identity is supposed to be grounded is not solid stuff; it’s made out of memory and desire, rather than rock and soil…”
Just as the mountains grow and the landscape shifts, so do our lives and cultures. Be flexible. Be open. Be kind.
Love what you’ve read here? Don’t forget to Subscribe to get frequent updates of new posts!
Huge thanks to my Patrons that make sharing all of these lovely posts with you possible (without all of the pop-ups and ads that make browsing other blogs so annoying). If you’re feeling generous, you too can support the wonder with a monthly contribution of your choice. Even $1 helps a lot! Your donation will help to fund this blog as well as my surprise free events and gifts for strangers. Learn more about this program at the link below:
New to wildcrafting? Learn more about safe and ethical foraging in this post!


Join me for a little winter night magic as we bake this cake full of rich seasonal flavors and black cocoa!